

Recipes for Shabbat
The Magic of Hafrashat Challah: Finding Holiness in Shabbat Preparations
Discover why separating challah can become the most meaningful moment of your Shabbat preparations, along with a foolproof homemade challah recipe
- Orit Grosskot
- | Updated
Of all the mitzvot traditionally associated with women, hafrashat challah (separating challah) is undoubtedly my favorite.
I'd love to tell you that it's a peaceful moment of solitude — a time when I pause everything, light a scented candle in my sparkling kitchen, and spend half an hour praying beside a bowl of perfectly risen dough. But the truth is, it looks nothing like that.
In the wonderfully chaotic rush of Friday preparations, separating challah is simply one moment woven into an endless stream of cooking, cleaning, conversations, laughter, a few family disagreements for seasoning, loud reminders ("Have you cleaned your room yet? You haven't even started?!"), and then more laughter. By then, the sink is usually overflowing with dishes that have already survived one or two rounds of cooking, and the countertop desperately needs to be cleared before I can even find enough space to shape the dough.
While the matbucha simmers and the eggs boil, I stop for just a moment. I take a breath. And I separate challah. Strangely enough, that's exactly where I find the magic.
A Simple, Heartfelt Moment
Separating challah on a Friday morning doesn't require me to attend an elegant women's event, dress up beautifully, or gather with thirty other women to recite Psalms. It simply asks me to close my eyes, place my hands on the soft, risen dough resting beneath its towel, recite the blessing aloud, and make sure at least one or two children are nearby to answer "Amen."
Then I hold up the small piece of dough I have removed from the batch and announce, with the familiar Friday smile my family always waits for: "This is challah."
Only then do I pause to pray. Sometimes my prayers are long. Sometimes they are brief. Over the past two years, they have been focused primarily on praying for our hostages, thanking God for those who have returned home safely.
And then the rhythm of the kitchen immediately resumes. Braiding the challot blends seamlessly into the beautiful chaos all around me.
Holiness Doesn't Require a Perfect Kitchen
It really doesn't matter what your kitchen looks like on a Friday morning. Maybe you've already washed every dish from Thursday night and everything is spotless. Or perhaps you're halfway through cooking, with flour on the counter and pots bubbling on every burner.
Either way, separating challah fits perfectly. It doesn't mind the mess. Sometimes I think that this uniquely hectic atmosphere of Friday preparations is exactly what my challah separation needs in order to remain simple, genuine, and deeply heartfelt.
A Foolproof Challah Recipe
Follow these instructions carefully, and you'll have beautiful challot every time.
Ingredients
2 kg (4.4 lbs) sifted white flour (white spelt flour also works well)
4 tablespoons dry yeast
1 measuring cup sugar
1 liter very warm water (not boiling, but comfortably warm)
240 ml vegetable oil
2 tablespoons salt
Optional: 2 large eggs
Instructions
Place the ingredients into the mixer bowl in this order: salt, flour, yeast, and sugar. With the mixer running on low speed, slowly pour in the warm water.
Every mixer is different. My old mixer could only knead one kilogram of dough at a time and required about ten minutes of kneading. A stronger mixer capable of handling two kilograms at once may produce excellent dough in only four or five minutes. Always follow your mixer's instructions.
If you don't own a mixer, don't worry. For years I made challah entirely by hand. About ten minutes of good kneading — and a decent arm workout, produces wonderful dough.
Once the dough begins coming together but there is still a little dry flour remaining, add the oil and increase the speed according to your mixer's instructions. Continue kneading for four to ten minutes, depending on your mixer.
If you've measured everything accurately, you'll end up with smooth, soft dough that isn't sticky and is easy to work with. If you added the eggs, the dough will naturally be stickier, but don't worry, that's completely normal. The finished challah will be even softer and fluffier.
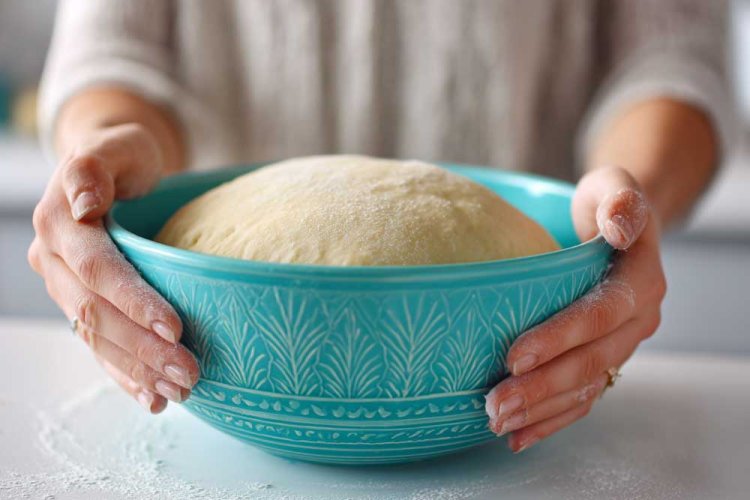
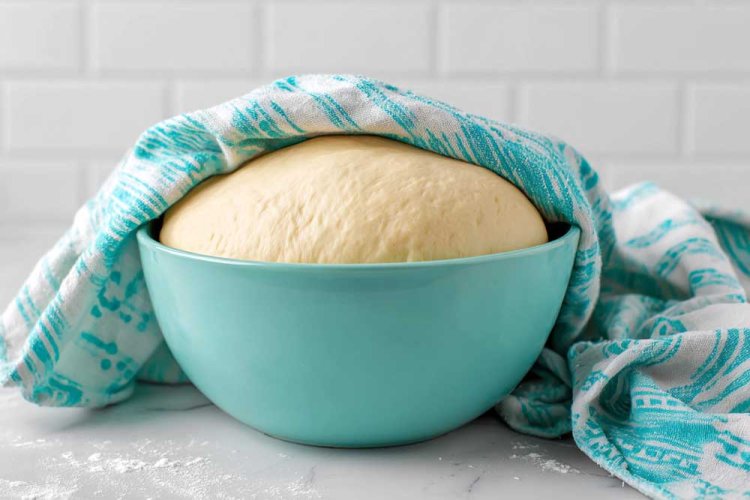
Transfer the dough to a lightly oiled bowl, cover it with plastic wrap or a plastic bag, and place a thick towel over the top. Leave it somewhere warm to rise. During the winter, sunlight works beautifully. In the summer, the kitchen itself is usually warm enough. I like placing the bowl near the stovetop, where the warmth from the cooking pots helps the dough rise.
When the dough has doubled in size, it's time to separate challah. During the summer, this can happen surprisingly quickly, so keep an eye on it while you're busy preparing everything else.
Separating the Challah
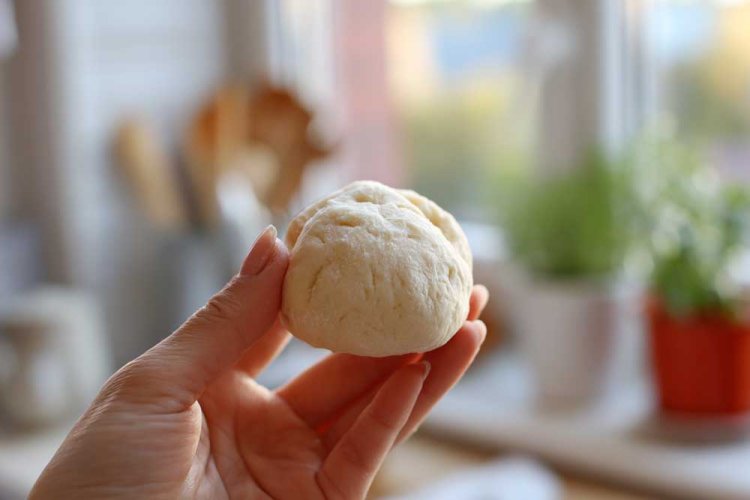
Place the covered bowl on a clean surface. Slide your hand beneath the towel so you can feel the dough without uncovering it, and remove approximately a fist-sized piece after reciting the appropriate blessing.
Ashkenazi blessing:
Baruch Atah Hashem, Elokeinu Melech ha'olam, asher kid'shanu b'mitzvotav v'tzivanu l'hafrish challah min ha'isah.
Sephardi blessing:
Baruch Atah Hashem, Elokeinu Melech ha'olam, asher kid'shanu b'mitzvotav v'tzivanu l'hafrish challah terumah.
After the blessing, hold the separated piece of dough and say: "This is challah."
Now comes one of the most meaningful moments — the time for personal prayer.
A Traditional Prayer After Separating Challah
"May it be Your will, Lord our God and God of our forefathers, that the mitzvah of separating challah be considered as though I fulfilled it in all its details and with perfect precision. May this separation be accepted like the offerings once brought upon the altar with favor. Just as challah was once given to the Kohen and served as atonement, may it likewise bring atonement for my sins, so that I may be renewed as though newly born, cleansed of sin and transgression. May I merit to observe Shabbat and the festivals with my husband, nourished by their holiness and by the spiritual influence of this mitzvah. And just as I perform this mitzvah wholeheartedly, may the Holy One, blessed be He, protect me from suffering and pain throughout all my days. Amen."
What to Do With the Separated Dough
Afterward, I wrap the separated piece in aluminum foil and burn it over the small burner on my gas stove. During other periods, I wrapped it securely in two plastic bags and disposed of it respectfully in the trash, which is also permitted according to halachah in appropriate circumstances.
As I place the dough over the flame, I like to say: "As long as Sarah our Matriarch lived, blessing rested upon the dough." (Yalkut Shimoni)
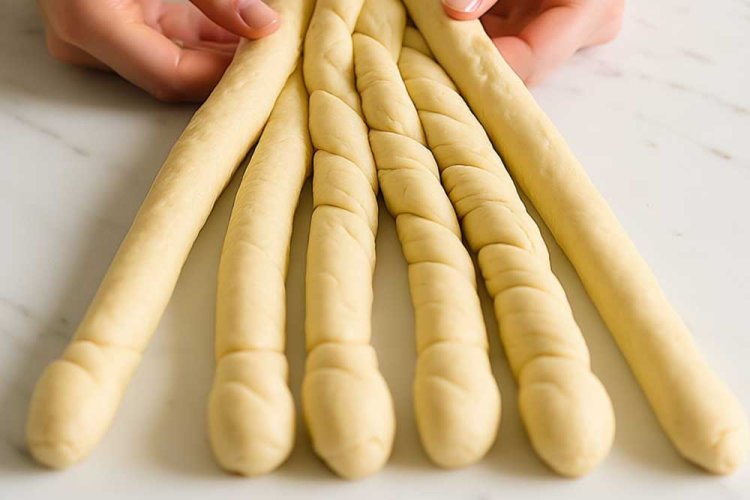
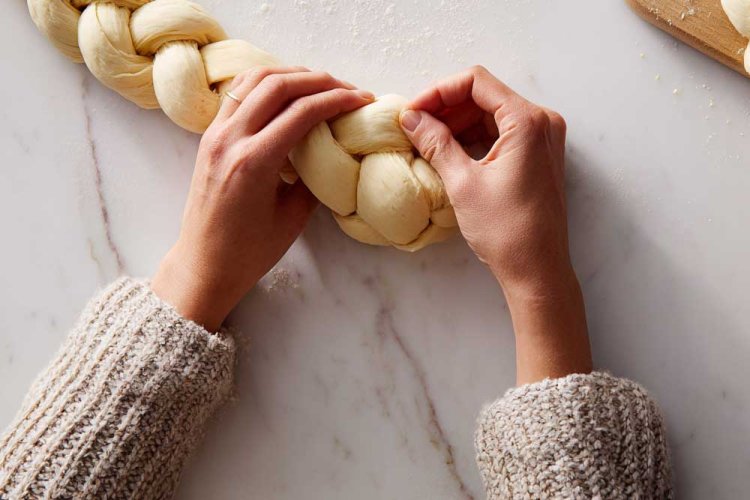
Braiding the Challot
Roll the dough into long strands and braid your challot. Three strands are absolutely wonderful. Yes, some women braid six strands. I'm here to tell you that three are more than enough. If you'd like something more intricate, you can learn four-strand braids from one of the many instructional videos available online.
Some bakers flatten each strand before braiding. If you're short on time, simply roll the strands into ropes and braid them directly.
Final Rise and Baking
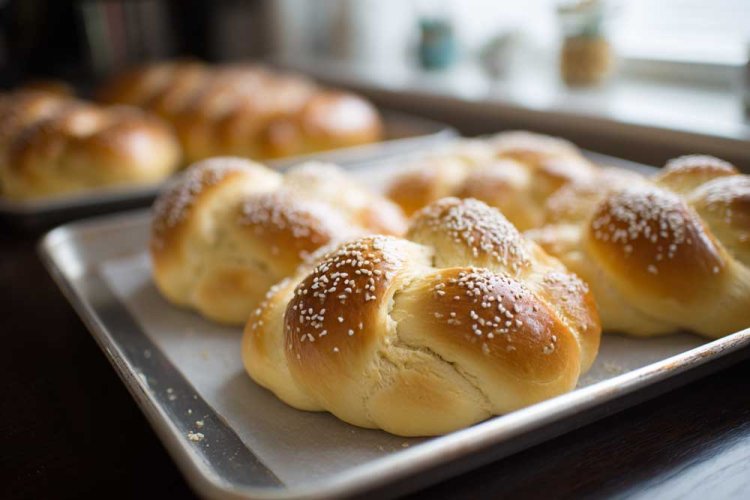
Prepare three or four baking trays lined with parchment paper. Place two or three challot on each tray, leaving plenty of room between them to expand.
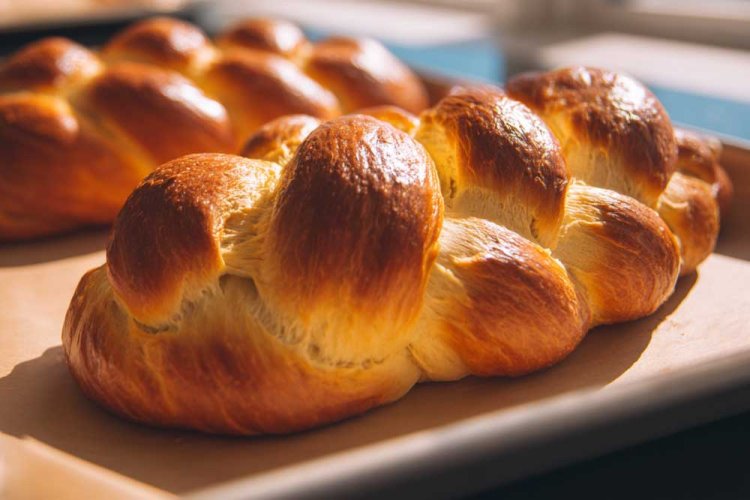
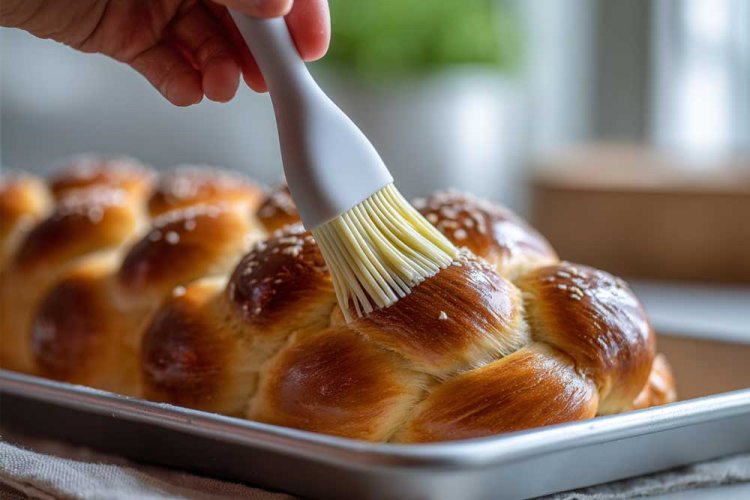
Allow them to rise again until they have doubled in size. Brush each loaf with beaten egg and sprinkle with sesame seeds if desired. My family accepts only white sesame seeds, although black sesame or pumpkin seeds are wonderful alternatives.
Bake one tray at a time in a preheated 180°C (350°F) oven for approximately 25 minutes. Make sure the oven is fully heated before placing the challot inside.
As soon as they come out of the oven, cover them immediately with a clean kitchen towel. After about twenty minutes, transfer them to an airtight bag to keep them wonderfully soft.
Tips for Taller Challot
If you love extra-high challot, braid a loaf about half the length of a loaf pan and place it inside the pan for its second rise. Allow it to double in size before baking. The sides of the pan will encourage the loaf to rise upward, creating beautifully tall challah.
Prefer Sweeter Challah?
Immediately after removing the challot from the oven, brush them with sugar syrup made from half a cup of boiling water mixed with five tablespoons of sugar. Then cover them with a towel. The result is irresistibly soft, lightly sweet challah.
Looking for a Different Flavor?
Brush the hot challot with olive oil as soon as they leave the oven and sprinkle them with a little coarse salt. It's simple, and absolutely delicious.
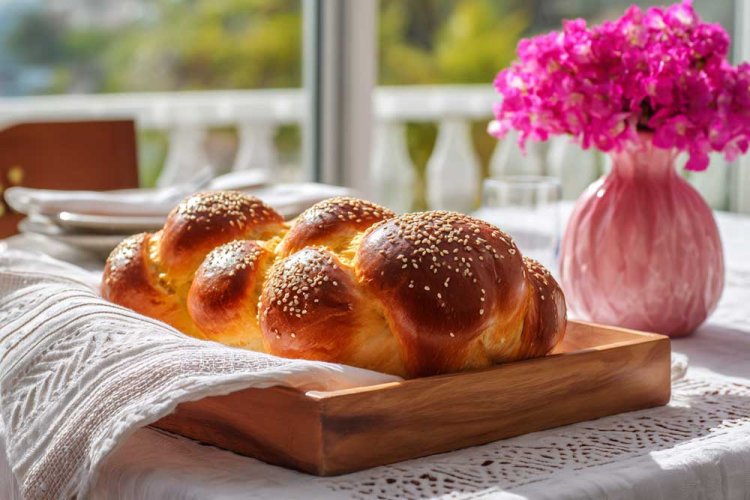
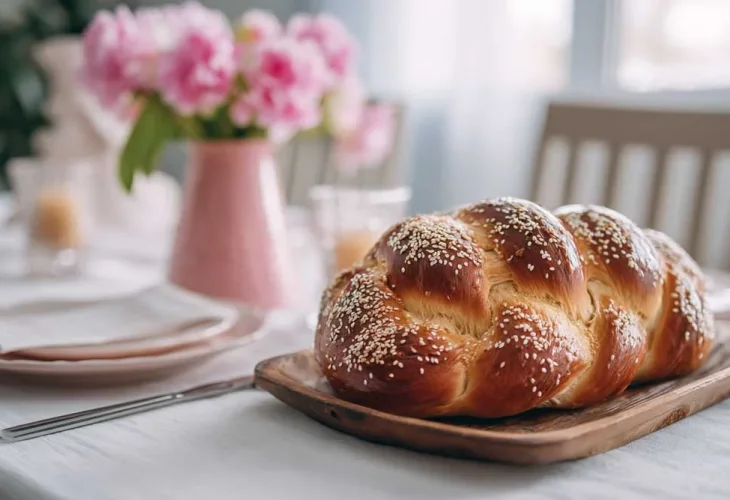
Shabbat Is Ready
Place your freshly baked challot on your beautifully set Shabbat table beside a vase of fresh flowers. You've baked challah for Shabbat. Sarah our Matriarch would be proud of you. God is surely proud of you as well.
Now you can finally sit down and rest… or head straight back to the kitchen to finish the matbucha. It all depends on where you are in your Friday preparations.
Good luck! I'd love to hear how your challot turned out.
Shabbat Shalom!
