

Raising Children
Turn a Shoebox Into a Miniature City: A Fun DIY Craft for Kids
Looking for a creative activity for kids? Learn how to build a miniature city from a shoebox using cardboard, colored paper, and everyday supplies.
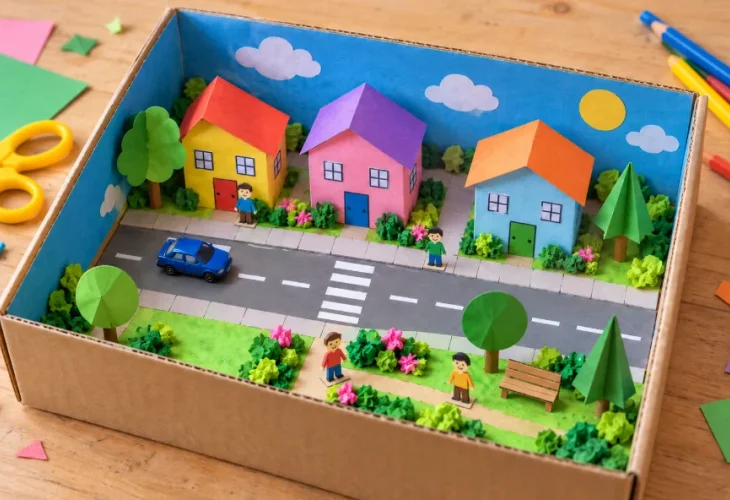
Who will live in the little house on the corner? Where will the roads lead? And should there be an ice cream shop next to the park? With an old shoebox, a few craft supplies, and a little imagination, your children can create an entire miniature city of their own!
This fun, hands-on activity encourages creativity, planning, and imaginative play while giving everyday materials a new purpose. Children can design their own buildings, roads, and parks, then bring their city to life with toy cars and miniature residents.
Start with just two or three buildings and a small park. Once the main pieces are in place, you can add as many details as you like, creating a little world that can grow and change over time.
What You'll Need
A wide shoebox or deep shoebox lid
Thin cardboard from empty packaging
Colored and white paper
Markers or gouache paints and a paintbrush
Craft glue suitable for paper and cardboard
Child-safe scissors
Cardboard tubes, leftover yarn, tissue paper, or other craft materials you have at home
Small toy cars and figures, depending on your children's ages
Step 1: Plan Your City and Prepare the Background
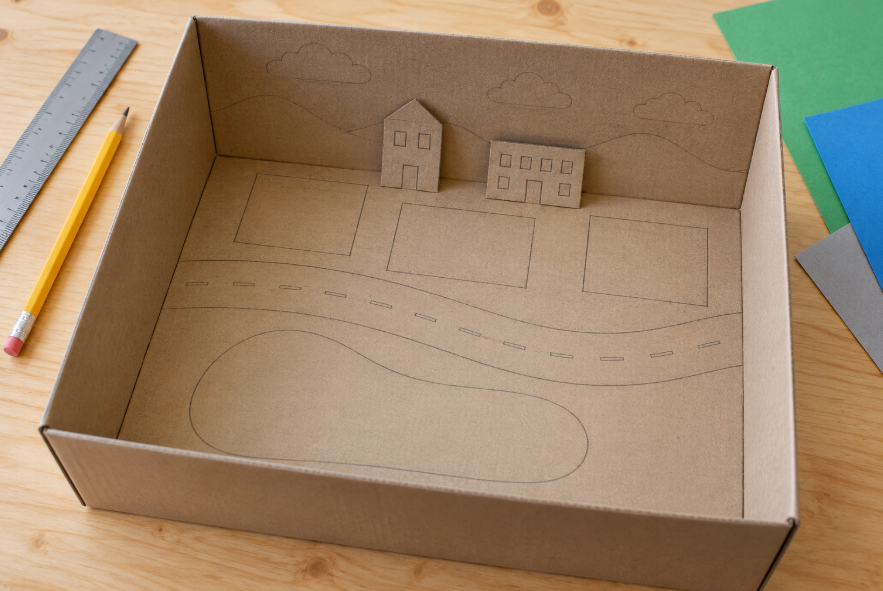
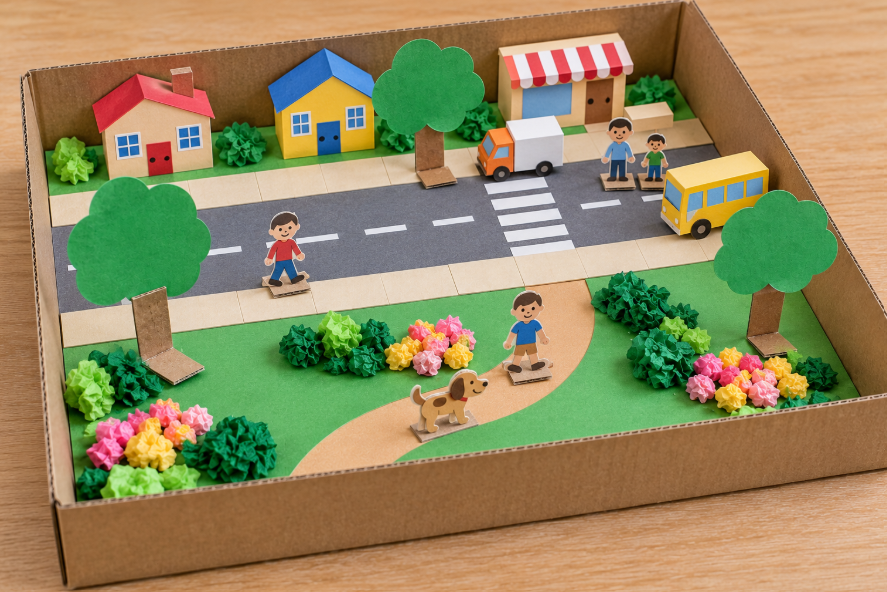
Place the shoebox with its opening facing up. The bottom of the box will become the ground, while the sides can serve as a backdrop for the sky, hills, or distant buildings.
Using a pencil, sketch out a road and decide where the houses and park will go. You can make the buildings from thin cardboard so they stand upright and give the city a three-dimensional appearance.
Before you begin decorating, make sure there's enough room for the toy cars and figures to move around. Once you're happy with the layout, paint the ground or cover it with colored paper.
Step 2: Make the Buildings
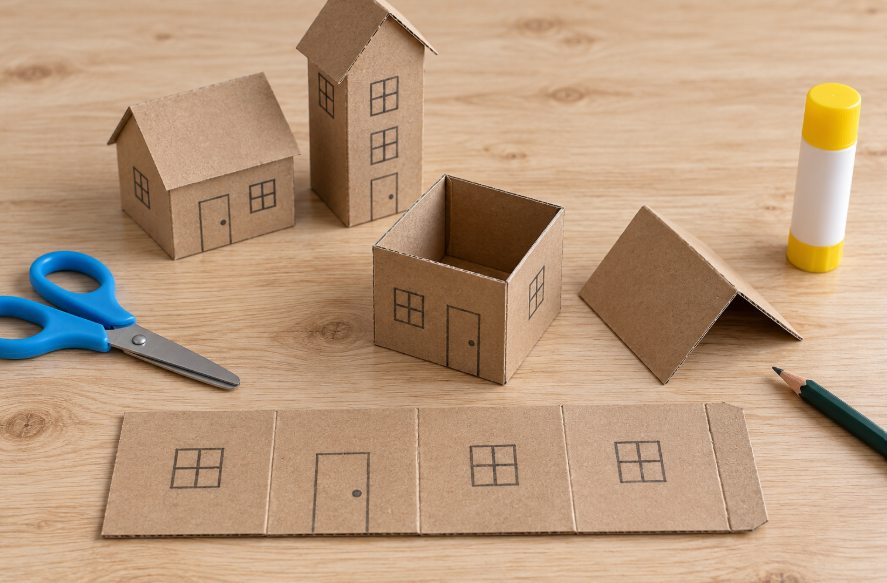
Cut a strip of cardboard and fold it to create four walls, leaving a small tab at one end for gluing. Draw windows, doors, and any other details you'd like, then glue the ends together to form a square building that's open at the top.
To make the roof, fold a rectangle of cardboard in half and glue it over the walls.
For an easier option, use small empty boxes as ready-made buildings. Try making houses of different heights and sizes to give your city a more realistic appearance.
Step 3: Add Roads, Sidewalks, and a Park
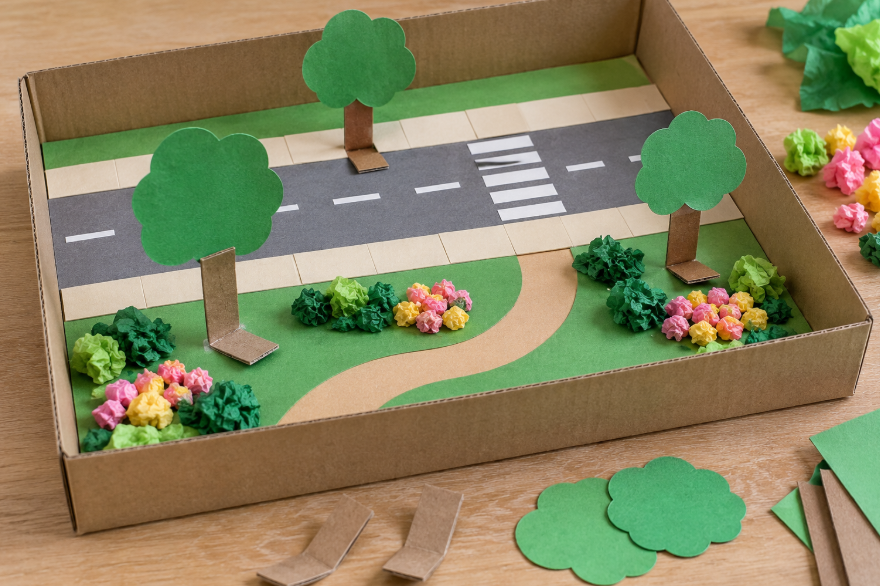
Create a road using gray or black paper, or simply paint it onto the bottom of the box. Add white lane markings and a crosswalk, then use strips of light-colored paper to make sidewalks.
For the park, glue down a piece of green paper and draw a winding path through it.
You can also make your own miniature trees! Fold a narrow strip of cardboard into an upside-down L shape. Glue the short end to the ground to create a base, then attach a paper treetop to the upright section.
Small balls of crumpled tissue paper make lovely bushes, flowers, or little garden beds. Feel free to experiment with whatever materials you have available.
Step 4: Bring Your City to Life
Now comes the really fun part! Give your city a name, add the toy cars and figures, and let your children's imaginations take over.
Encourage them to invent little stories and adventures. Perhaps a delivery truck needs to find its way to the store, someone has lost their dog, or a bus is picking up passengers around town.
Try not to glue every piece into place. Leaving some buildings, vehicles, and figures loose allows children to rearrange their city and create new stories each time they play.
You can even make it an ongoing project by adding something new every day, whether it's a school, a playground, a bakery, or another little house.
A Few Tips for Parents
Let your children take the lead in designing their city, even if their ideas are a little unusual. The goal isn't to create a perfect model, but to give them the freedom to experiment, solve problems, and use their imagination.
Help younger children with more difficult cutting and gluing tasks, and remember that hot glue guns and strong adhesives should only be handled by adults. For very young children, use larger pieces and avoid small objects that could pose a choking hazard.
Best of all, this isn't just a craft project that gets put away when it's finished. It's a miniature world your children can return to again and again, adding new places, characters, and adventures whenever inspiration strikes.

