

For the Woman
How to Shape Your Eyebrows at Home Without Overplucking
Shaping your eyebrows yourself? Learn which hairs to remove, how to avoid overplucking, and what to do if you accidentally tweeze too much.
It starts with one stray hair that bothers you. Then you remove another to even things out, and before you know it, one eyebrow is noticeably thinner than the other. Sound familiar?
Shaping your eyebrows at home can be surprisingly tricky, especially when you're concentrating on individual hairs rather than the overall shape. The good news is that you don't need professional skills to tidy up your brows. With the right tools, good lighting, and a little patience, you can achieve a neat, natural look without overdoing it.
If you're a beginner, the most important rule is simple: work with your natural eyebrow shape rather than trying to change it. Focus on removing only the stray hairs that clearly fall outside your brows.
Step 1: Gather Your Tools and Find Good Lighting
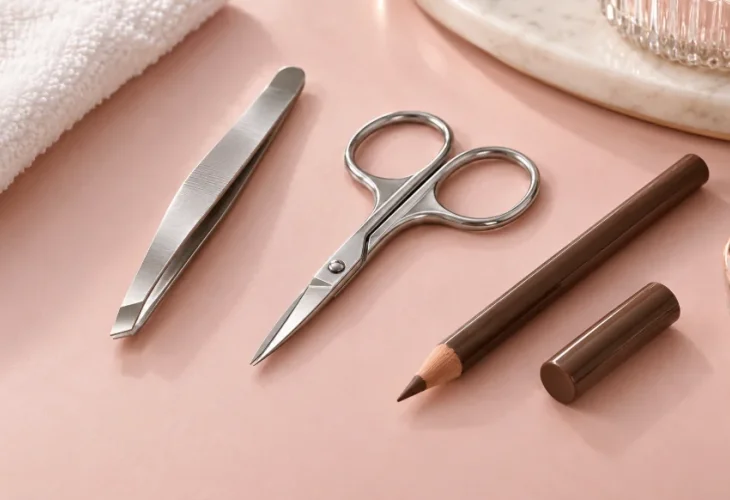
Before you begin, make sure you have everything you need:
A good-quality pair of slanted-tip tweezers
An eyebrow brush or spoolie
Small eyebrow scissors (optional)
A regular mirror
An eyebrow pencil (optional)
Start by washing your hands and gently cleansing the skin around your eyebrows. Clean your tweezers as well, and if you use rubbing alcohol to disinfect them, allow them to dry completely before starting.
Choose a well-lit spot, ideally near a window with natural daylight. Good lighting makes it easier to identify stray hairs without accidentally removing ones that belong to your natural brow.
Avoid relying on a magnifying mirror. When every tiny hair appears enormous, it's tempting to keep plucking until you've removed far more than you intended.
Instead, use a regular mirror that allows you to see your entire face and assess how your eyebrows look together.
Step 2: Brush Your Brows Into Place
Before removing a single hair, brush your eyebrows upward and outward, following their natural direction of growth.
You might be surprised to discover that some hairs you thought were out of place actually blend into the brow once they're brushed properly.
If it helps, use an eyebrow pencil to lightly outline your natural brow shape. This creates a guide and makes it easier to see which hairs should stay.
For your first few attempts, avoid trying to create a dramatic new arch, thin out the beginning of your eyebrows, or significantly change their shape. A little tidying is usually all you need.
Step 3: Tweeze Slowly and Check Your Progress
Start with the obvious stray hairs between your eyebrows and those that sit clearly below the natural brow line.
Gently hold the skin taut with one hand, then use your tweezers to grip each hair as close to the root as possible. Pull carefully in the direction of hair growth to reduce discomfort and the risk of breaking the hair.
Work slowly, removing just a few hairs at a time.
Every so often, put down your tweezers, step back from the mirror, and look at both eyebrows together. This helps you maintain their natural proportions and prevents you from becoming too focused on one small area.
And remember, if you're unsure whether a hair should be removed, it's better to leave it alone.
Step 4: Be Careful With Trimming
One of the most common eyebrow-shaping mistakes is trimming too much.
If you're a beginner, you can skip the scissors entirely. Often, simply brushing your eyebrows into place and applying a little clear brow gel is enough to keep longer hairs looking neat.
If you do decide to trim, brush the hairs upward and carefully snip only the very tips that extend noticeably beyond your natural brow shape. Avoid cutting straight across the entire brow, which can leave the hairs looking uneven or patchy.
It's also important to remember that eyebrows are naturally a little different from one another. Trying to make them perfectly identical can lead to unnecessary plucking and an unnatural result.
Once you've finished, your skin may look slightly red or feel sensitive. Apply a cool, clean compress to soothe the area, and avoid rubbing or using potentially irritating skincare products immediately afterward.
What If You've Already Overplucked?
First, resist the urge to keep going! If one eyebrow looks thinner than the other, don't remove more hairs from the fuller brow just to make them match.
Instead, use an eyebrow pencil to fill in any sparse areas with short, light strokes that resemble natural hairs. A tinted brow gel can also help create the appearance of fuller brows.
Overplucked eyebrows often grow back with time, although regrowth can vary depending on how frequently the hairs have been removed and whether the follicles have been damaged.
If you're hoping to make a significant change to your eyebrow shape, consider visiting a professional for the initial shaping. Once you have a shape you're happy with, maintaining it at home becomes much easier.
Ultimately, the secret to beautiful, natural-looking eyebrows isn't removing more hair. It's knowing when to stop. A few carefully chosen tweaks can make all the difference without sacrificing the fullness and shape of your brows.

