

Home Styling
Black Mold on Shower Silicone? Here's What to Do
Before scrubbing that moldy shower seal again, check these warning signs. Learn when to clean, when to replace, and how to keep moisture under control.
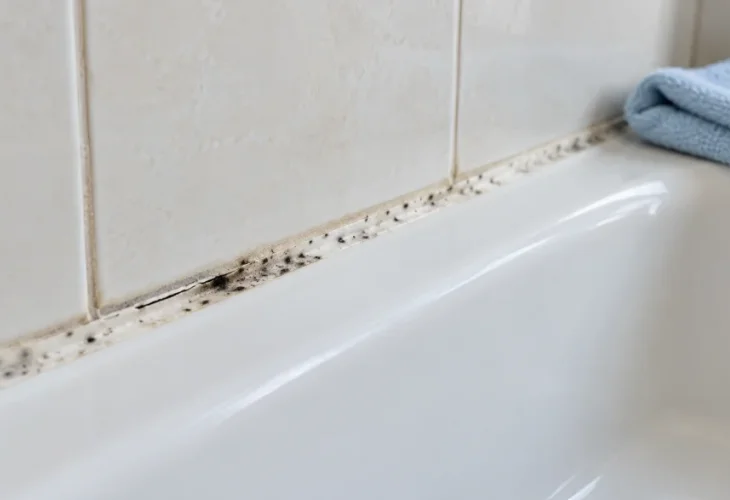
There's nothing more frustrating than stepping into a sparkling clean shower after spending hours scrubbing the bathroom, only to notice that stubborn black mold along the silicone seal.
No matter how thoroughly you clean the tiles, bathtub, and shower doors, those dark stains can make the entire bathroom look dirty.
Silicone sealant plays an important role in keeping your bathroom watertight. It seals the joints around bathtubs, shower stalls, and other areas where water could seep through gaps.
Unfortunately, these are also places where moisture and soap residue tend to accumulate. Because corners and joints often take longer to dry, they create ideal conditions for mold to develop, even in bathrooms that are cleaned regularly.
The good news is that not every moldy silicone seal needs replacing. Sometimes a thorough cleaning is enough. In other cases, however, the problem goes beyond surface stains.
Here's how to tell the difference.
When Is Cleaning Enough?
Before reaching for cleaning products, take a closer look at the silicone seal.
If it's still firmly attached, with no cracks, peeling edges, or visible gaps, cleaning may be all that's needed.
For surface mold, use a bleach-based bathroom cleaner suitable for the surrounding materials, following the instructions on the label. Allow it to sit for the recommended amount of time, then wipe the area with a damp cloth and rinse as directed.
If you're using a specialized mold remover, check that it's safe for your bathtub, tiles, grout, and nearby metal fixtures. Some products can damage certain surfaces.
Always wear protective gloves and make sure the bathroom is well ventilated while cleaning.
Most importantly, never mix bleach with vinegar, limescale removers, ammonia, or other cleaning products. Certain combinations can release dangerous gases.
Avoid using steel wool, sharp tools, or excessive force when scrubbing. Aggressive cleaning can scratch or damage the silicone, potentially making the problem worse.
Keep in mind that some dark discoloration may remain even after surface mold has been removed, particularly if the staining has penetrated the sealant.
When Should You Replace the Silicone?
Sometimes cleaning simply isn't enough.
If the silicone is cracking, peeling away from the surface, or developing gaps, it's no longer providing the watertight protection it was designed for.
Another warning sign is black staining that repeatedly returns shortly after cleaning. This may indicate that moisture or mold has become trapped beneath or within the sealant.
In these situations, replacing the silicone is usually the better solution.
One common mistake is applying a fresh layer of silicone directly over the old, damaged seal. While this might temporarily improve its appearance, it doesn't address the underlying problem and may prevent the new sealant from bonding properly.
Instead, carefully remove the old silicone, including any remaining residue. Thoroughly clean the exposed surfaces and allow them to dry completely before applying a new seal.
Choose a bathroom-grade sanitary silicone designed for wet areas and compatible with the surfaces you're sealing. Follow the manufacturer's instructions for application and curing time before using the shower again.
If you notice persistent dampness, loose tiles, water damage, or signs that moisture has reached the wall behind the seal, consult a professional before resealing. Simply covering the gap won't resolve a deeper moisture problem.
How to Prevent Mold From Coming Back
Once your shower is clean and properly sealed, a few simple habits can help keep mold from returning.
The most important step is reducing the amount of moisture that lingers in the bathroom.
After showering, use a squeegee or cloth to remove excess water from the walls, corners, and areas around the silicone seals.
Run the bathroom exhaust fan during and after showering, or open a window when possible to improve ventilation.
Regularly wipe away soap residue, and pay particular attention to corners and joints where water tends to collect.
It's also worth checking the silicone occasionally for early signs of cracking or peeling. Catching a small problem before it develops into a larger gap can help prevent water damage.
Ultimately, keeping shower silicone clean isn't just about appearance. A properly maintained seal helps protect the surfaces beneath your shower and bathtub from unwanted moisture.
And sometimes, the secret to a bathroom that looks truly spotless isn't another round of scrubbing, but knowing when it's time for a fresh seal.

