
Raising Children
DIY Flower Art for Kids: A Fun and Easy Nature Craft
Turn simple cardboard drawings into colorful 3D artwork using real flowers. This creative, hands-on activity is perfect for kids who love art, nature, and imaginative play.
- Tehila Cohen
- | Updated
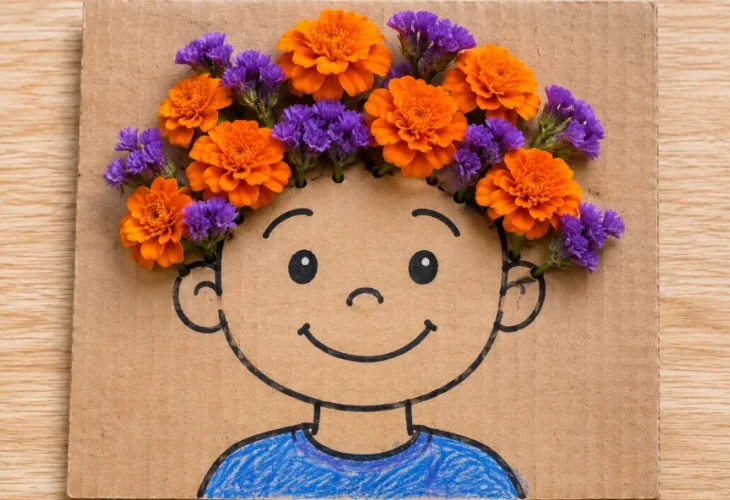
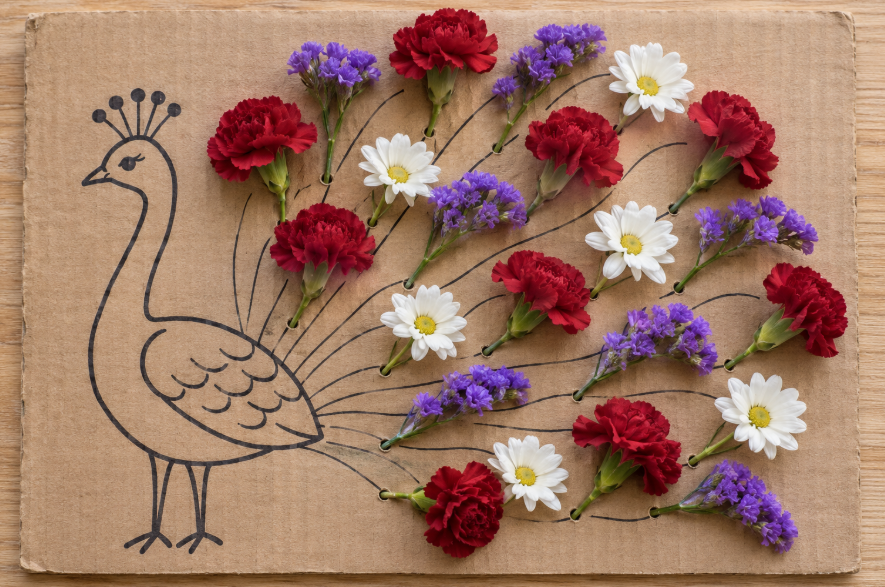
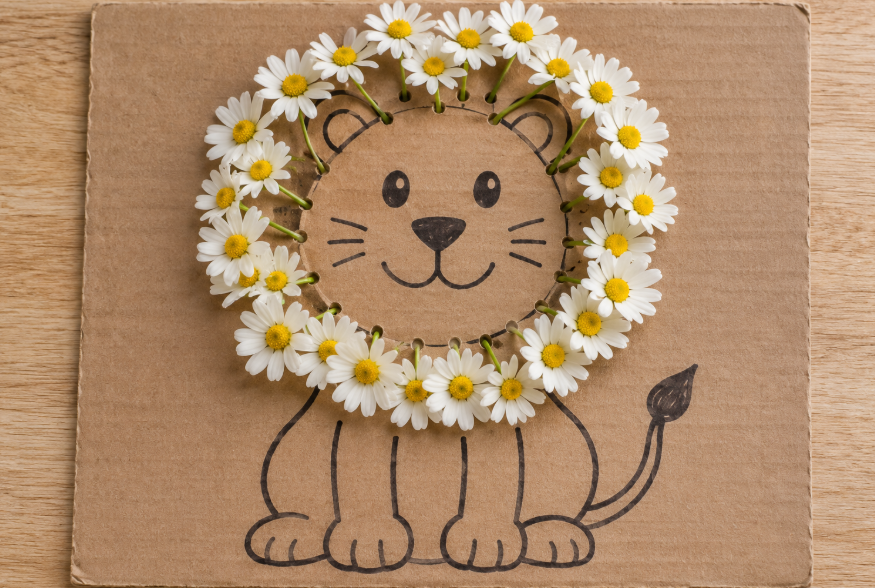
What would a lion look like with a mane made entirely of flowers? Or a peacock with a magnificent tail of colorful petals?
This creative activity transforms ordinary drawings into beautiful, three-dimensional works of art using real flowers and a piece of cardboard. Children can experiment with colors, arrange blooms, and watch their pictures come to life as each flower adds a new detail.
Best of all, the project requires just a few basic supplies. You can use leftover flowers from a bouquet, blooms from your own garden, or artificial flowers. Choose familiar, non-toxic varieties without thorns, and avoid picking protected wildflowers or flowers from public gardens.
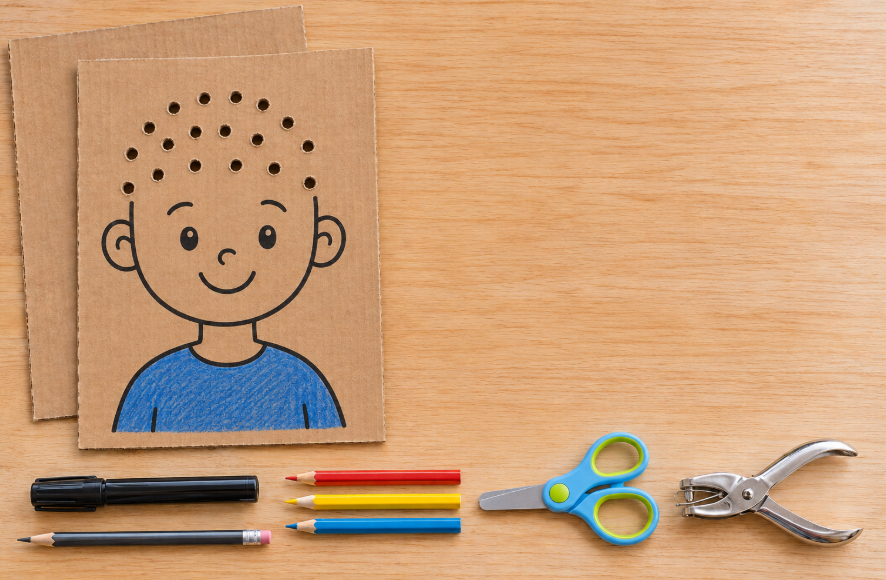
What You'll Need
A clean, flat piece of cardboard (approximately 8 × 10 inches or 20 × 25 cm)
A pencil and thick black marker
Crayons, colored pencils, or markers
Small flowers with stems
Scissors
A pointed tool for making holes (adult use only)
A thick, protective work surface
Tape (optional)
Step 1: Draw Your Design
For beginners, a flower vase is a wonderful place to start. Draw a vase near the bottom of the cardboard and decorate it with colorful stripes, polka dots, hearts, or other patterns. Leave the upper section blank to make room for a bouquet of real flowers.
For something more imaginative, draw a lion's face and use flowers to create its mane, or sketch a peacock whose tail will be formed from brightly colored petals. Children can also draw a face and create a floral hairstyle. The possibilities are endless.
Step 2: Make the Holes
Use a pencil to mark where you want the flowers to go. Begin with approximately 10–15 dots, spacing them about 1 inch (2–3 cm) apart, depending on the size of the blooms.
An adult should place the cardboard on a thick, protective surface and carefully make a hole at each marked point. The holes should be wide enough to accommodate the stems without allowing them to slip out.
For safety, never puncture cardboard while holding it in the air or resting it on your lap.
Step 3: Add the Flowers
Trim the flower stems to approximately 1–2 inches (3–5 cm), removing any leaves that might interfere with inserting them.
Lift the cardboard slightly above the table and gently thread each stem through a hole, starting from the decorated side. The stem should extend behind the cardboard, leaving the flower visible on the front. Push it through until the bloom rests close to the surface, taking care not to crush the petals. If needed, secure the stems on the back with small pieces of tape.
Now comes the fun part! Encourage children to experiment with different arrangements and color combinations. They might create a fluffy white mane for their lion, a cheerful pink-and-yellow bouquet, or a vibrant peacock tail. Each flower transforms the picture, making every creation unique.
Step 4: Capture Your Creation and Start Again
Once the artwork is complete, carefully prop it up without crushing the stems and take a photograph to preserve the finished design.
Fresh flowers will eventually wilt because they are not kept in water, but that is part of what makes this project special. Simply remove the old blooms and reuse the cardboard to create an entirely new arrangement.
For younger children, prepare the cardboard and holes in advance and help them thread the stems through. Remember to wash hands after handling the flowers.
This simple activity combines art, nature, and hands-on creativity, giving children the opportunity to design something beautiful while practicing their fine motor skills. And because the flowers can be replaced, the same picture can become a new masterpiece again and again.