

Raising Children
How to Make a Paper Pinwheel: Easy DIY Craft for Kids
Learn how to make a colorful paper pinwheel with simple materials and easy step-by-step instructions. A fun, creative activity for kids to enjoy at home
- Tehila Cohen
- | Updated
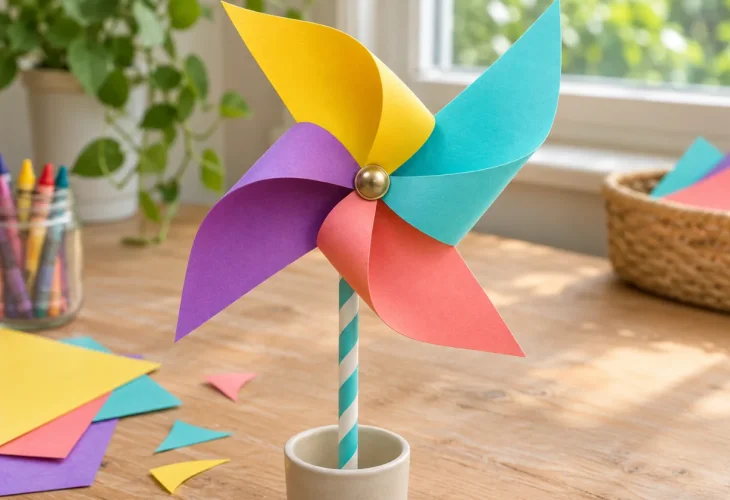
There's something about a spinning pinwheel that never fails to bring a smile. Colorful pinwheels twirling in the breeze are a cheerful sight, and making one at home is a simple, enjoyable activity for children.
This lightweight paper pinwheel is best tested by blowing on it gently rather than exposing it to strong winds, as it's made from regular paper rather than thick cardstock. You can use colorful paper or let children decorate their own designs.
For younger children, it's best to prepare the cut paper in advance and let them focus on decorating and bringing the corners toward the center. An adult should handle the final assembly.
What You'll Need
One square sheet of colored paper, approximately 15 × 15 cm (6 × 6 inches), preferably colored on both sides
One sturdy paper or plastic straw
One brass paper fastener (split pin) with a wide head
Pencil and ruler
Scissors
Hole punch
Regular paper or lightweight craft paper works best, as thick cardstock is harder to fold and may prevent the pinwheel from spinning freely. The paper fastener is a small metal component and should be handled by an adult throughout the activity. This craft is not suitable for children who still put small objects in their mouths.
Step-by-Step Instructions
Step 1: Decorate the Paper
Decorate both sides of the paper using markers or colored pencils. If you're using gouache paint, apply a thin layer and allow it to dry completely before continuing. You can color each quarter of the paper differently, add large polka dots, or create any design you like. There's no need for precise artwork—the more colorful, the better!
Step 2: Mark and Cut the Paper
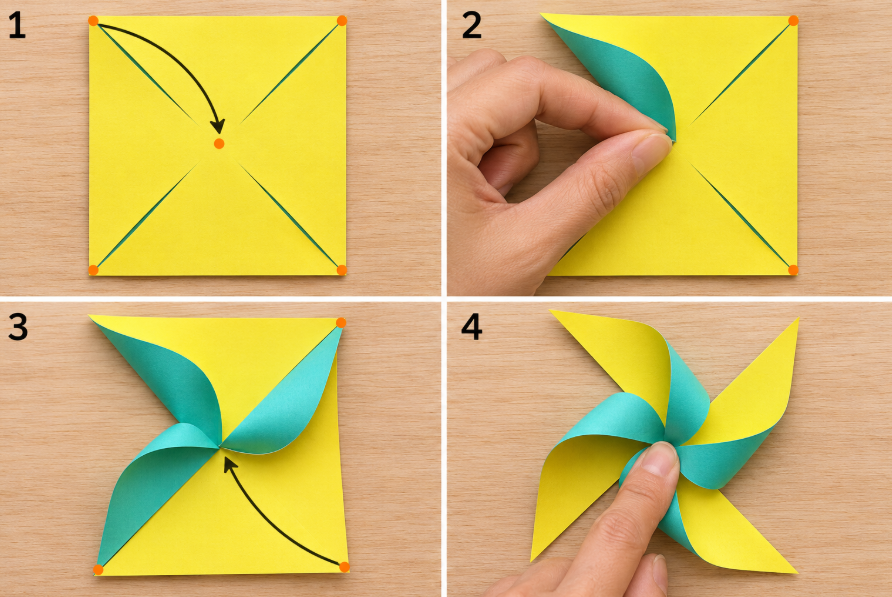
Place the square sheet of paper on a flat surface. Using a ruler, draw two diagonal lines connecting opposite corners to form an X. The point where the lines intersect marks the center of the paper.
On each diagonal, mark a stopping point approximately 2 cm (¾ inch) from the center. Starting at each of the four corners, cut along the diagonal lines, stopping at the marked points. Do not cut all the way to the center, as the uncut section holds the pinwheel together.

Step 3: Fold Four Corners Toward the Center
Once you've finished cutting, you'll have four triangular sections, each with two outer corners. Choose one corner from the first triangle and gently bring it toward the center. Continue around the paper, bringing the corresponding corner from each triangle toward the center, always working in the same direction.
You should end up with four corners meeting in the center and four remaining on the outside. Avoid flattening the folds or creating sharp creases. The pinwheel's blades should remain slightly rounded and raised so they can catch the air and spin.
Step 4: Attach the Pinwheel to the Straw
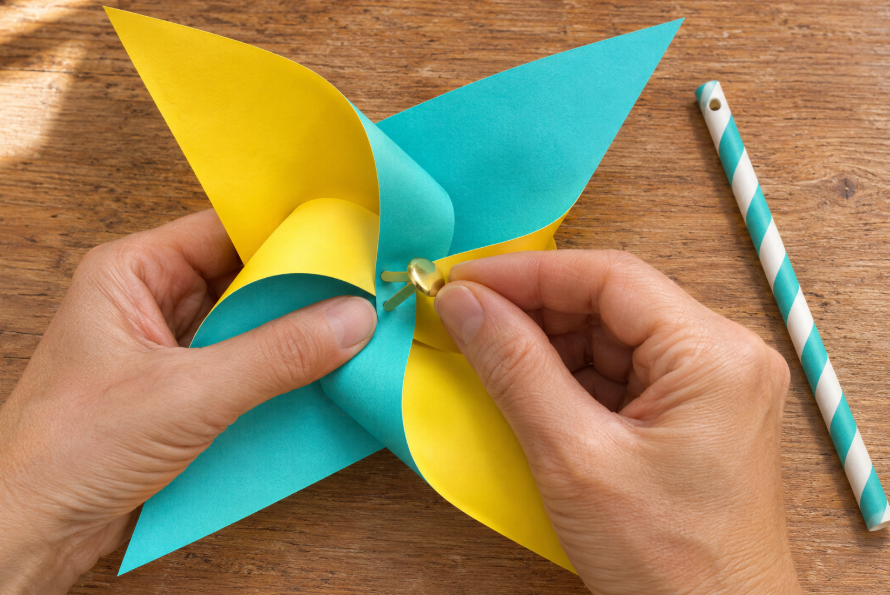
An adult should punch a small hole in the center of the paper and in each of the four corners that have been brought toward it. Next, make a hole through both sides of the straw, approximately 2 cm (¾ inch) below its upper end.
Thread the brass paper fastener through the four folded corners, then through the center of the paper, and finally through the straw. Open the two prongs of the fastener behind the straw and bend them securely so they don't stick out.
Leave a small gap between the paper and the straw. If the fastener is secured too tightly, the pinwheel won't be able to spin. Before giving the finished pinwheel to a child, make sure the attachment is secure and that no sharp metal edges are exposed.
Step 5: Test Your Pinwheel
Hold the straw below the pinwheel without touching its blades. Blow gently toward one of the blades from the side and watch it spin. You can also take your pinwheel onto a balcony or into the yard and see how it moves in a light breeze.
If the pinwheel doesn't spin, check that the fastener isn't too tight, the holes allow the paper to move freely, and the blades aren't pressing against the straw. With a little adjustment, your colorful homemade pinwheel should be ready to twirl!
 Raising ChildrenDon't Toss Them: 5 Surprisingly Fun Crafts from Toilet Paper Rolls
 Raising ChildrenFun Family Craft Ideas to Prepare for Summer Break
 Raising ChildrenDIY Erupting Volcano: The Kids’ Experiment That Brings Science to Life
 Raising ChildrenBack-to-School DIY: Creative Notebook Ideas Kids Will Love

