
Raising Children
Easy Fall Tree Craft for Kids Using Real Autumn Leaves
Turn colorful fallen leaves into beautiful autumn tree art with this simple DIY craft. A fun, creative activity for kids using paper, glue, and materials collected outdoors.
- Tehila Cohen
- | Updated
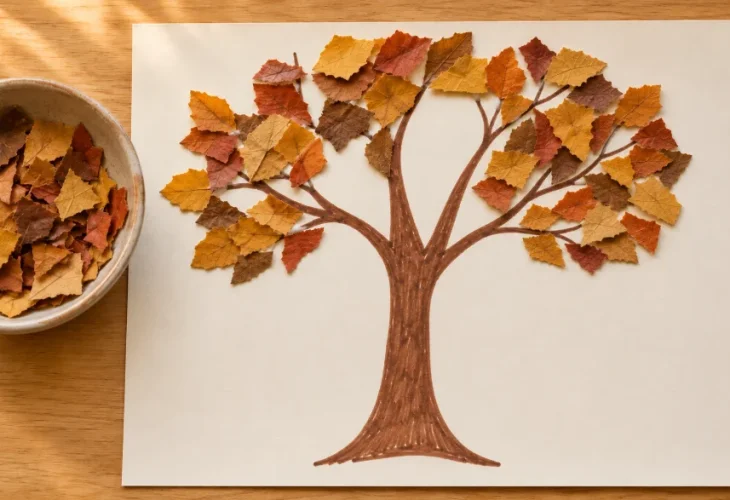
This charming autumn craft requires just a few simple materials: paper, a brown marker, glue, and fallen leaves. It's a wonderful opportunity to enjoy a walk outdoors with the children, collect colorful autumn leaves, and turn them into a creative project that will keep little hands busy even when it's raining outside.
Up close, you can admire the delicate veins and textures of the leaves. From a distance, the pieces come together to form a beautiful autumn tree.
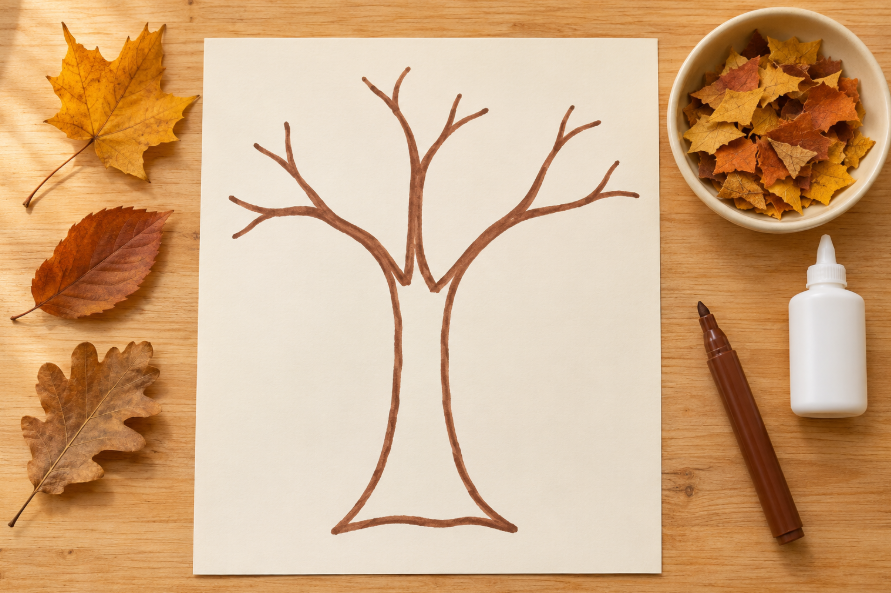
What You'll Need
A sheet of thick drawing paper or light-colored cardstock
A brown marker or colored pencil
A handful of clean, dry fallen leaves, preferably in different autumn shades
Child-safe white craft glue
A small bowl or tray for the leaf pieces
Step-by-Step Instructions
Step 1: Collect and Break Up the Leaves
Take a short walk outdoors and look for leaves that have already fallen from the trees. Choose ones that are dry and clean, ideally in a variety of colors. Broken leaves work perfectly well, too.
Once you're home, gently crumble or break the leaves into pieces over a small bowl. Try to create a mixture of sizes, with larger pieces for filling in broad areas and smaller fragments for decorating narrow spaces.
Step 2: Draw the Tree Trunk and Branches
Using a brown marker or colored pencil, draw a wide tree trunk starting at the bottom of the page. Extend several branches upward and outward, then add one or two smaller branches to each main branch.
Leave enough space between the branches and above them to create a full, leafy treetop. For extra detail, children can add a few darker brown lines along the trunk to give the tree more depth and texture.
Step 3: Create the Treetop With Leaf Pieces
Apply a few small drops of glue near the ends of the branches. Place a piece of dried leaf onto each drop and press gently to secure it.
Work on one small section at a time so the glue doesn't dry before the leaves are attached. Mix yellow and brown leaves along the same branches for a natural autumn effect, or use different shades on each side of the tree.
Leave a few gaps between the pieces so that some of the drawn branches remain visible.
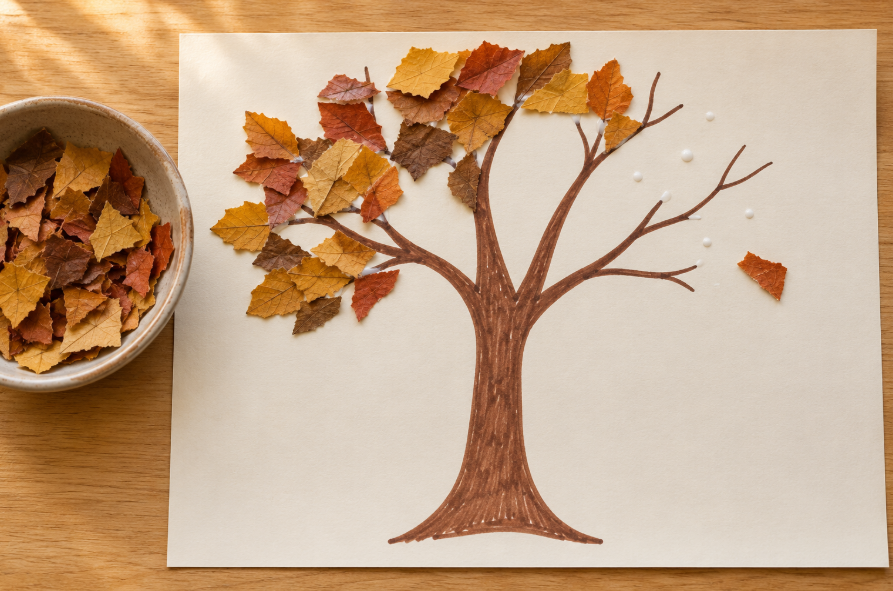
Step 4: Add Falling Leaves Beneath the Tree
Glue several leaf fragments near the base of the trunk to create the appearance of fallen leaves scattered across the ground. You can also place two or three pieces between the branches and the ground to make it look as though they're floating gently through the air.
Once the picture is complete, lay it on a flat surface and allow the glue to dry thoroughly. Finally, tilt the paper gently over a tray to shake off any loose leaf fragments that haven't stuck.
Your beautiful autumn tree is now ready to display! It's a simple, creative way to bring a little of the outdoors inside while enjoying a relaxing seasonal activity together.