
Raising Children
Easy Aluminum Foil Art for Kids: A Fun DIY Craft
Learn how to create beautiful raised artwork using aluminum foil, yarn, and cardboard with this simple step-by-step craft for kids
- Tehila Cohen
- | Updated
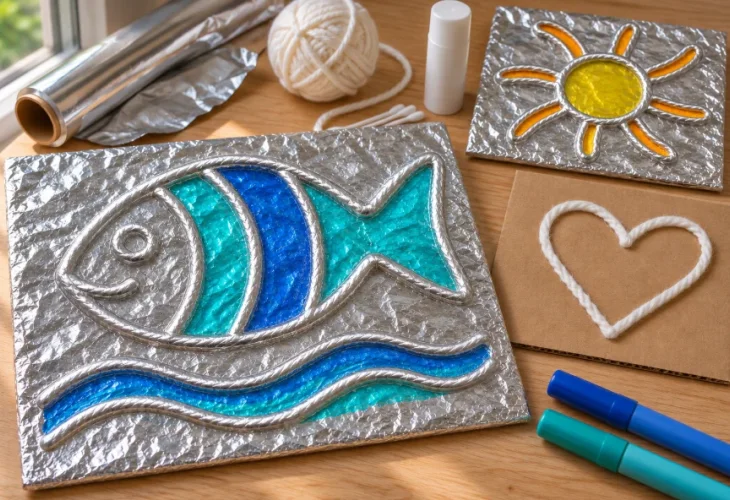
This creative craft is a wonderful way to spend quality time with your children while making beautiful textured artwork from simple materials you probably already have at home. By combining cardboard, yarn, and aluminum foil, children can create raised designs that look surprisingly impressive.
For younger children, it's best to start with a simple shape, such as a sun or heart. Older children can experiment with more elaborate pictures featuring several shapes, patterns, and decorative details.
What You'll Need
A piece of cardboard, approximately 15 × 20 cm (6 × 8 inches), or any preferred size
Thick yarn or cotton string
White craft glue
Glue stick
Aluminum foil
Pencil and scissors
Cotton swabs
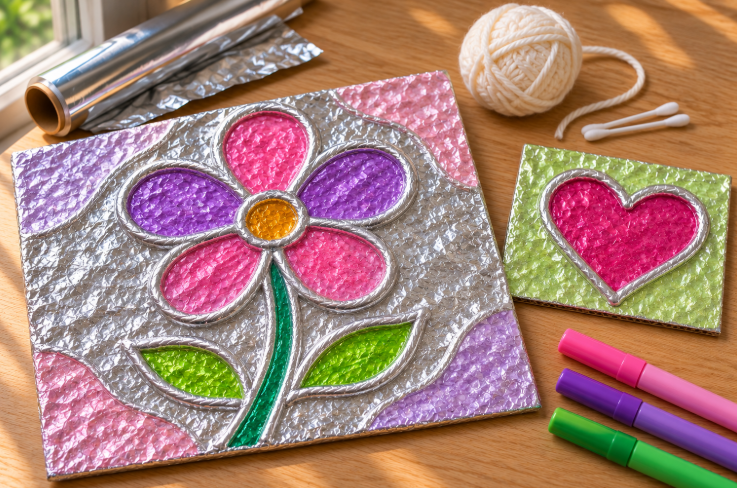
Optional: Markers suitable for metal or smooth surfaces, following the manufacturer's age recommendations
Step-by-Step Instructions
Step 1: Draw Your Design
Begin by covering your work surface and arranging the materials. Using a pencil, draw a simple design on the cardboard. A fish, flower, house, heart, or a few flowing lines are excellent choices for beginners.
Leave enough space between the lines to make it easier to press the aluminum foil around them later. Very small or closely spaced details may become difficult to see beneath the foil. Children who prefer a more imaginative approach can create abstract designs using circles, curves, and geometric shapes.
Step 2: Attach the Yarn
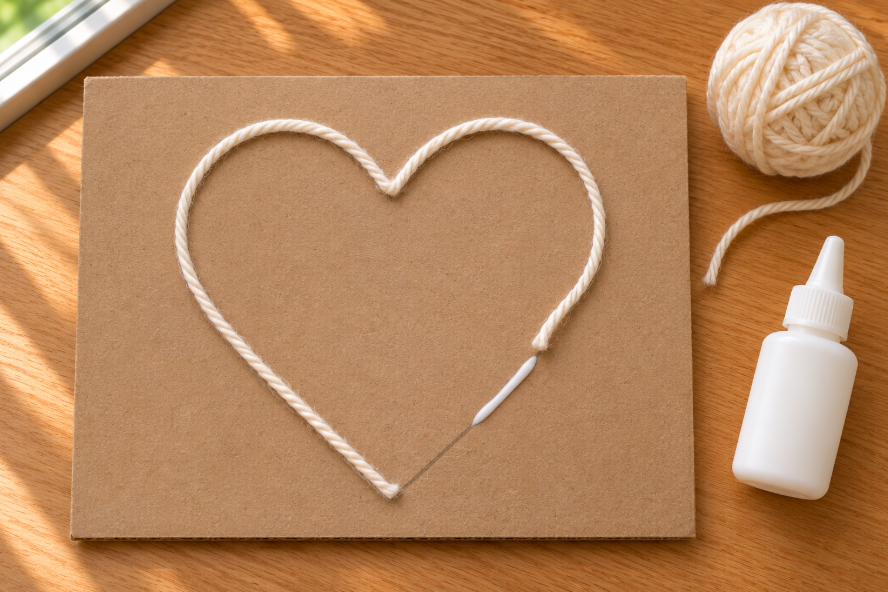
Apply a thin line of white glue along the pencil drawing, then carefully position the yarn over it, pressing gently to secure it in place. Avoid stacking several strands on top of one another, as overly raised sections can make the foil difficult to apply smoothly.
Allow the glue to dry completely before continuing. Check that the yarn is firmly attached and doesn't shift when touched lightly.
Step 3: Cover the Picture With Aluminum Foil
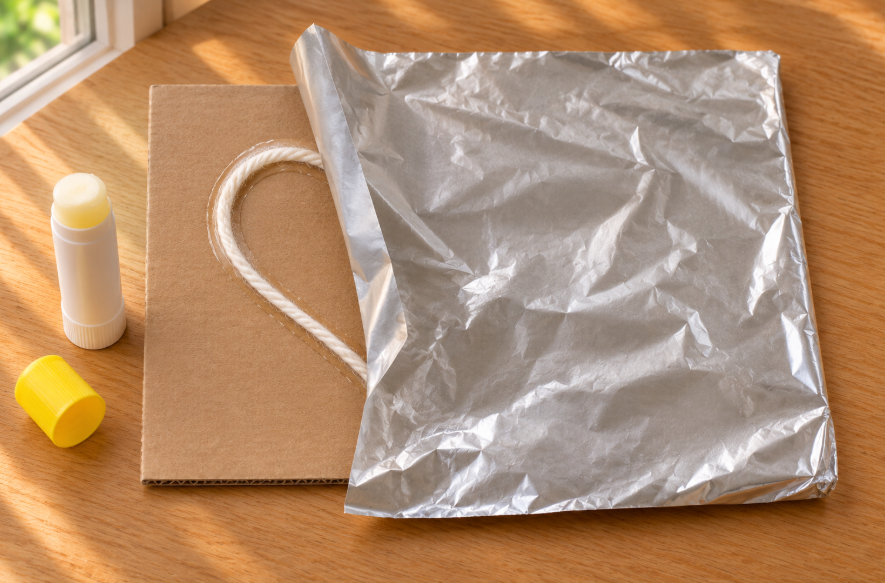
Cut a sheet of aluminum foil several centimeters larger than the cardboard on every side. Keep the foil as smooth as possible, since excessive wrinkles can make the design harder to see. Slightly thicker foil is generally easier to work with.
Gently apply a thin layer of glue stick to the exposed cardboard between the yarn lines. Carefully place the aluminum foil over the design, then fold the excess foil around the edges and secure it to the back of the cardboard.
Step 4: Reveal the Raised Design
Starting at the center of the picture, gently smooth the foil outward with your fingers. Locate the yarn beneath the surface and carefully press the foil into the spaces alongside it. As the foil settles around the yarn, the raised outlines will gradually become visible, creating a beautiful textured effect.
Use a cotton swab to work around smaller details, applying gentle pressure with short, careful movements. Avoid using pencil tips, fingernails, or sharp objects, which could tear the foil.
If a small tear appears, simply cover it with another piece of aluminum foil secured with a little glue stick, then smooth the area carefully.
Step 5: Add Color and Finishing Touches
Your foil artwork can be left silver for a striking metallic effect or decorated with colorful markers. Before coloring, test your markers on a leftover piece of foil to make sure the ink adheres properly and doesn't smudge.
For an eye-catching design, try coloring certain sections while leaving others silver to create contrast. Once the artwork is dry, you can add a simple frame made from strips of cardstock.
The finished picture makes a lovely homemade decoration and gives children the satisfaction of transforming everyday household materials into their own unique piece of art.